click picture
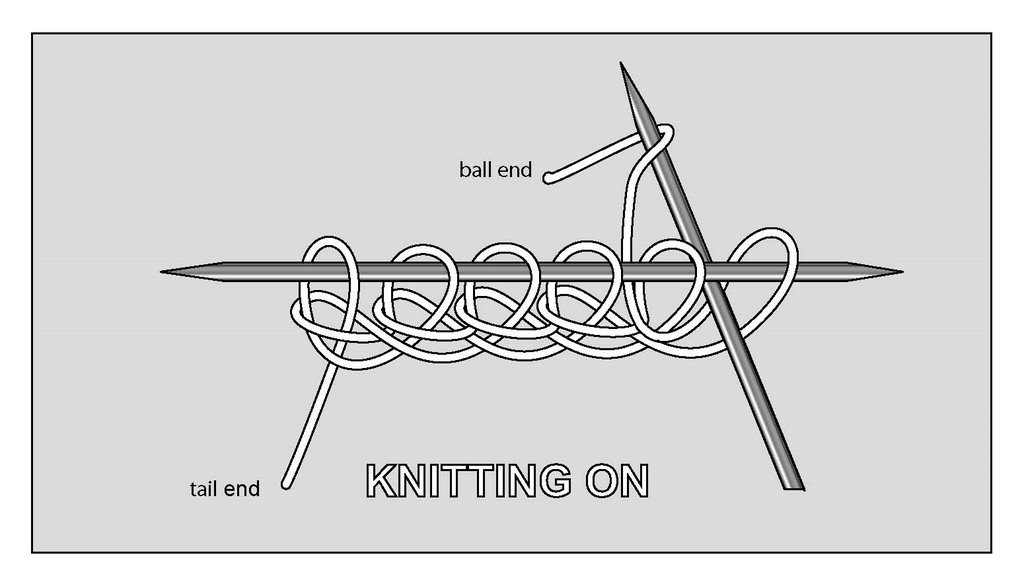
"Knitting on" is an excellent cast-on method. The edge is created from a doubled yarn, which makes it durable. The method is easy, the tension not difficult to adjust. Also, unlike long-tail casting on, there's no annoying long tail to position and fool with. This method is also called "cable" or "chain" cast on.
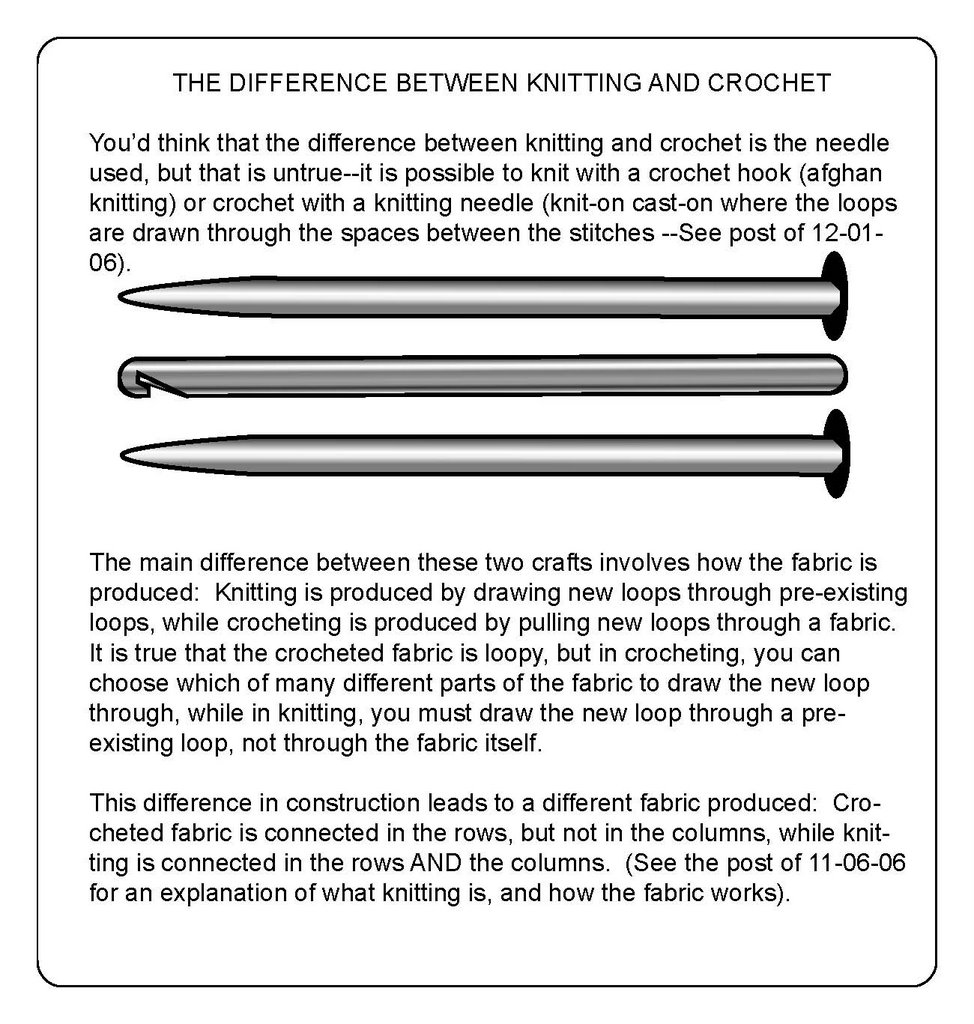
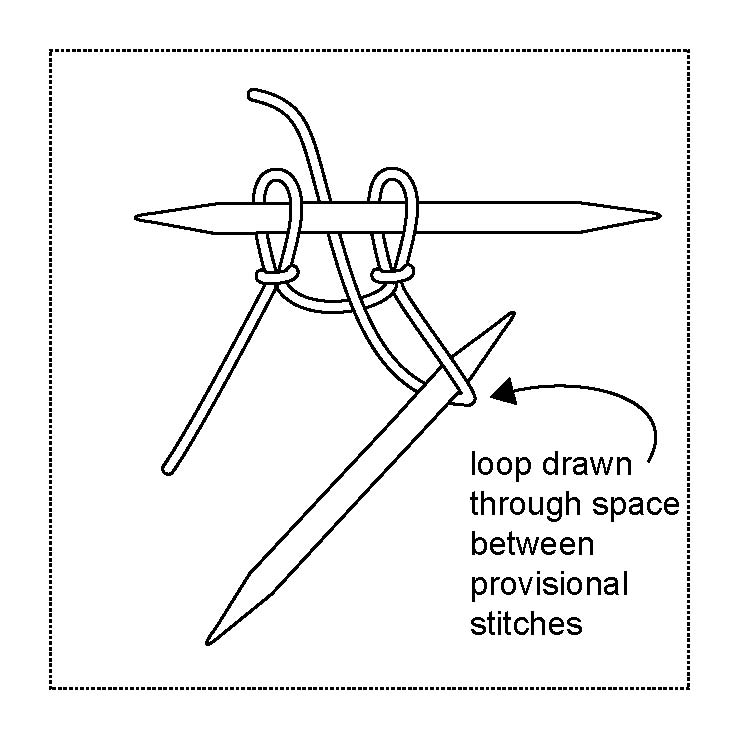
Knitting-on is actually a form of crochet. It is made by drawing new loops with your right needle through a previous set of loops on your left needle, to make a foundation row for knitting. Some instructions will tell you to draw the new loop actually through the previous loop, and that does work. However, a more flexible edge arises by drawing the new loop through the space BETWEEN the previous two loops.
Obviously, in order to draw a new loop through the space between two already-existing loops, you have to have two loops already on your needle. Here's a trick to making the---
FIRST TWO STITCHES
Many knitters start knitting-on with a slip knot. In the last post it was stated that slip knots are not an optimal way to start a cast on because they leave a hard knot in one corner of the knitting.
Slip knots are especially easy to avoid in knitting-on, and here's how: start by making 2 slip knots. (...it'll all come clear, keep reading...) These first two loops are provisional loops.
Next, cast on the number of stitches you actually want to have. In other words, cast on the number wanted, not counting the first two provisional stitches.
When you're done --ta da!--pull out the two provisional stitches. All you have left on your needle now are actual knit-on stitches, there's no slip knot left in your fabric to contend with, and all the stitches in the foundation row look and act the same.
KNITTING ON--How to
You can probably figure out how to knit-on based on the first illustration, but here it is again, one more time, slower, with explanations:
* * *
First step
First step
click picture
 Two provisional stitches (slip knots) have been made in the tail end of the yarn, and placed on the left needle. Insert the right needle into the space BETWEEN the provisional stitches. With the right needle, catch the ball end of the yarn "up from under." This wrap around the right needle will become the first "real" knit-on foundation loop.
* * *
Second step
Second step
click picture
 Using the right needle, draw the loop through the space between the two provisional stitches.
* * *
Third step
Third step
click picture
 Transfer the loop (drawn up large) from the right needle to the left needle. Be careful not to twist the loop.
* * *
Fourth step
Fourth step
click picture
 Snug up the transferred loop. Insert the right needle into the space between the two previous stitches, catch the ball end of the yarn and repeat steps two through four until you've cast on the correct number of stitches. At the end of the process, don't forget to unravel the two provisional stitches.
* * *
Two final notes:
1) The very first illustration at the top of this post shows what the knitting-on will look like after the two provisional loops have been taken off.
2) If you're wondering about the double pointed needles, here's the deal--knitting-on to double pointed needles makes it much easier to drop the two provisional stitches off the left tip of the left needle BEFORE you accidentally knit into them. If using single pointed needles, remember to unravel the two provisional stitches when you get to them in the first row of knitting.
--TECHknitter
You have been reading TECHknitting on cable cast on, also called chain cast on